Passover Book
Ekleyen : Okul Öncesi Forum
Tüm Yazıları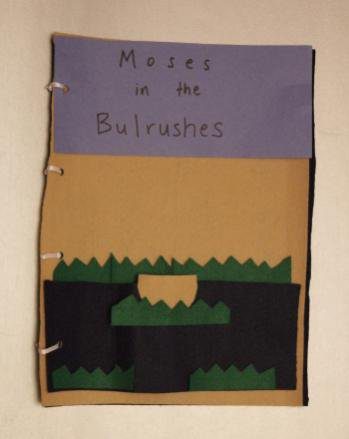
What You Need:
Same-size squares or rectangles of felt
Scissors
Hole punch
Ribbon
Fabric glue
Different colored sheets of felt for adding page details
Various accessories such as buttons, snaps, crinkly paper, etc.
What You Do:
Start by assembling the body of the book. Stack the felt squares, or pages, together (you might have to do a few groups at a time) and using a hole punch, make four evenly spaced holes in each page. Six pages is a good length for your first book.
Tie the pages together with the ribbon, knotting one ribbon securely around each grouping of holes.
It’s time to make the cover! You can cut out felt letters or use a fabric marker to write the title right on the felt.
Now, make a plan for each page. For a Passover book, choose a theme in keeping with the celebration. Here are some example pages to get the creative juices flowing:
Moses in the Bulrushes: Using green and brown felt, make long fringes that children can run their fingers through to find the basket with baby Moses that is glued to the page.
Parting of the Red Sea: Sew a zipper onto two pieces of blue felt and glue the edges to the page. When you zip it up, it’s all blue water; when you unzip it, there’s a row of felt Israelites crossing.
Moses and the Ten Commandments: Use fabric glue to attach Velcro tape to three different shapes: a rectangle, a circle and a square. Make a felt Moses holding the Ten Commandments written on three tablets of those same three shapes and attach the corresponding Velcro, so that children can match the shapes. If you want, you can sew a little pocket on the back of the previous page to stash the shapes.
By Amy Brayfield
ZİYARETÇİ YORUMLARISizde kendi yorumlarınızı gönderebilirsiniz...


 Okul Öncesİ Çocuklari İÇİn İngİlİzce kelİme eĞİtİm programi
 İngİlİzce zit kavramla konusu İÇİn bİr fİkİr
 Metal Cloth Embroidery Art
 Felt Alphabet Letters
 Kid Friendly Batik: No Wax Required!